How about decorating your home or office creatively? Fiber optic ceiling lights could be exactly what you need. They are energy-efficient, low-maintenance, and provide a stunningly beautiful glow that can transform any room. But installing them can seem daunting.
In this post, we will help you install fiber optic ceiling lights from start to finish. We will also discuss fiber optic ceiling lamps definition, installation, obstacles, and maintenance. This guide contains everything you need to install and enjoy these stunning lights for years.
How Fiber Optic Ceiling Lights Work
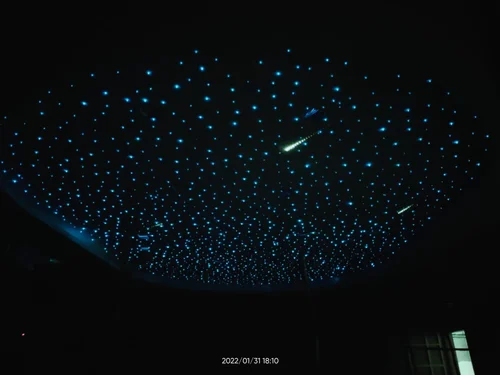
Fiber optic ceiling lights use bundles of cables to create a starry-night sky effect. These popular home theater lights are customizable and stunning. Fiber optic star ceiling lights add beauty to any room. Installation is only as effective as the planning and preparation that go into it. You must understand fiber optic ceiling lights’ basics before installing them in your space.
Consider fiber type, starlight effects, and color options to create a stunning and immersive experience. Explore how a fiber optic ceiling light kit can change your environment.
What are fiber optic ceiling lights?
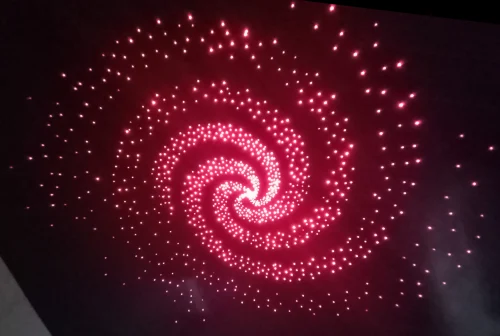
Fiber optic ceiling lights are a popular lighting choice for creating stunning visual effects. These lights use fiber optic cables, decorative fixtures, and a light source to create a starry sky or other celestial scenes. The energy efficiency and low maintenance of fiber optic star ceiling lights make them attractive.
Benefits of Fiber Optic Ceiling Lights
Fiber optic ceiling lights offer a range of benefits that can enhance any space.
- These lights create a captivating atmosphere with their distinctive illumination. Custom patterns and colors enable you to customize your environment with their design versatility.
- Fiber optic ceiling kits are durable and low-maintenance. These lights need fewer bulb replacements and less maintenance than standard lighting.
- They are energy-efficient; they use less power, saving money over time.
- Fiber optic starlight ceiling lights also provide a relaxing ambience, making them ideal for bedrooms and leisure spaces. Their calm lighting might help you relax after a hard day.
- Fiber optic ceiling lights’ versatile design, durability, energy efficiency, and calming ambience make them aesthetically fascinating.
- Fiber optic ceiling lights are great for dressing up a bedroom or a business environment.
What are the installation tools and materials?
Fiber optic starlight ceiling lighting requires some tools. Create a ceiling hole with a drill bit, fiber optic cable bundles, fittings, and an LED light source or projector. Use a fiber optic cable cutter and stripper to cut and strip cables to the appropriate length. Finally, you’ll need glue or clips to keep the wires in place and produce the appropriate lighting effect.
Safety Tips for Installation
When installing fiber optic ceiling lighting, safety comes first. Start by shutting off the electricity to your workspace to prevent electrical issues.
- To avoid danger, use goggles and gloves.
- Prepare ceiling material, drill bit, fiber optic cables, LED light, cutter, and stripper.
- To avoid overloading, ensure the electrical circuit can manage the lights’ power needs.
If you’re unsure about your skills, call an expert for installation. These safety measures will ensure a secure and efficient installation.

How to Install a Fiber Optic Ceiling Light: A Step-by-Step Guide
Install fiber optic ceiling lights using these simple steps.
Start by arranging your design, including light arrangement and placement, for the best effects. Prepare the ceiling by cleaning and removing impediments after planning.
Next, carefully position the fiber optic wires according to your plan, avoiding knots. Carefully drill ceiling holes for fibers with a proper drill bit. Align the fibers and fix them with glue or clips.
Follow the manufacturer’s instructions to connect fiber optic wires to the light source or projector. After connecting, trim the fiber ends and touch up. Check the lights’ functionality.
You can install beautiful fiber optic ceiling lights outdoors by following these procedures.
Step 1: Planning Your Design
When putting in fiber optic lights, you need to plan ahead to get the lighting effect and style you want. Room size, light source location, and fiber optic cable configuration are first. These considerations will help you create an installation strategy. Before picking these materials, strategically install fiber optic ceiling lights to achieve the desired ambience and aesthetic effect. Consider fiber optic technology’s brilliant hues and stellar effect. This planning step ensures that your fiber optic ceiling lights boost your space’s appearance.
Step 2: Preparing the Ceiling
To install fiber optic ceiling lights smoothly, the ceiling must be prepared. Dust and clean the ceiling before installation. Clear the surface for lighting.
Install fiber optic wires by marking the ceiling. This will guide drilling and ensure the lights are appropriately placed and set according to your plan.
To avoid damaging ceiling wiring and structural parts, use the right drill bit while drilling fiber optic cable holes. Avoid obstacles and drill accurately.
Following these procedures and correctly prepping the ceiling will lay the groundwork for installing fiber optic ceiling lights. This will provide a smooth, beautiful finish that improves your room.
Step 3: Arranging the Fiber Optic Cables
Fiber optic wires should be fed via ceiling holes to start. Secure cables with glue or clamps to prevent strain or extreme bends. Next, connect the LED light source or projector cables following the manufacturer’s directions. This phase is crucial for light operations. Test the lights before installing them to ensure they work. This will reveal issues before installation. Installation may begin when the lights are tested and functional.
Step 4: Drilling the fiber holes
To make sure that fiber optic ceiling lights are put in correctly, it is important to drill holes for the wires with great care. Avoiding damage to sensitive textiles demands careful caution. A fiber optic drill bit creates clean, precise holes for efficient light dispersion. Measure and mark hole sites before drilling.
Preventing splintering and cracking when drilling requires proper technique. The right drilling method reduces the danger of fiber damage and structural difficulties. Ensuring the holes are in the appropriate position will also improve the starry effect and color display of fiber optic ceiling lights. The best fiber optic ceiling lights may be installed using these instructions.
Step 5: Inserting and Securing the Fibers
After drilling ceiling holes, insert and secure fibers. When inserting fragile fibers into holes, treat them cautiously. Avoid bending or twisting to protect the fibers. To keep the fibers securely in place, you can use adhesive or mounting brackets. Make sure to evenly distribute the fibers and check that they are properly aligned for optimal light distribution. It’s also important to follow safety precautions when handling the fibers, as they can be quite fragile.
Step 6: Connecting the Light Source
To connect the fibers to the light source, you’ll need appropriate connectors to ensure efficient light transmission. Make sure to align the fibers properly and secure the connections, as this will directly impact the quality of the light. Before finishing the installation, test the connections for functionality. For a secure connection, follow the manufacturer’s wiring and power supply instructions. Always contact a fiber optic ceiling lamp installation specialist if you’re uncertain about the procedure. For a successful connection, follow these procedures.
Step 7: Trimming Excess Fiber Ends
When installing fiber optic ceiling lights, use precision fiber optic cutters to trim excess fiber ends. Remove sharp edges and protrusions to prevent injury and ensure safety. Avoid cutting fibers too short, as this limits flexibility for adjustments. Leave enough length for modifications, and clean the trimmed ends to remove debris. Since the fibers are fragile, handle them carefully. These methods ensure a polished and professional appearance for your fiber optic ceiling light installation.

Step 8: Testing and Final Touchups
Check the installed fibers for defects. Make sure fiber optic wires are intact. Make adjustments to ensure the ceiling lighting is equal. This entails examining and modifying fiber alignment to distribute light evenly. Testing the whole system ensures all fibers work. Verify the desired illumination effect, such as hue or starry pattern. Fix any discrepancies before installing. This may require fixing connection or color issues. By properly verifying and testing the fiber optic ceiling lights, you can confidently install them and create a beautiful and effective lighting solution.
Possible Challenges During Installation
There are various hurdles to installing fiber optic ceiling lighting. One problem is overcoming space limits in restricted installation places. Planning and measuring the area are crucial to installing fiber optics without problems.
Another issue may be electrical or structural. Assessing the infrastructure and rerouting wire to overcome hurdles is crucial. This will make installation easy and protect existing buildings.
Fiber optic routing and bundling for a tidy look are also important. The organization and security of fiber optics ensure a clean and professional appearance and prevent fiber breakage and tangling.
Color and optical lighting effects are hard to accomplish. Colors and lighting effects vary with fibers and light sources. Experimental and adjustment stages are needed to achieve the goal.
Finally, effective installation requires addressing light leakage and uneven fiber distribution. Sealing and attaching fibers assures ceiling distribution and light leakage.
By anticipating and addressing these challenges, fiber optic ceiling lights may be installed easily.

How to Overcome Potential Difficulties
Planning and preparation are key to overcoming potential difficulties in installing fiber optic ceiling lights. Seek professional guidance for complex installations, use specialized tools for space limitations, and optimize fiber routing for a clean setup. Experiment with different colors and techniques for desired effects.
Maintenance Tips for Your Fiber Optic Ceiling Lights
Regular fiber inspections are essential for detecting damage or degradation. This keeps your fiber optic ceiling star lights for the bedroom working well. For best light transmission, clean the fibers and lenses occasionally. Dust and debris may degrade the quality of light. Checking the connections and light source for loose or broken parts might cause lighting system disruptions. Fixing problems quickly prevents future damage or dysfunction. Expert maintenance may be wise if you’re not confident in your fiber optic ceiling lamp maintenance or repair skills to ensure long-term reliability. This keeps fiber optic ceiling lights glowing for years.
How long does a fiber ceiling light last?
Fiber optic ceiling panels are renowned for their durability and longevity. With proper maintenance, they can last for many years without significant degradation. The lifespan varies based on quality and installation, but on average, these lights can endure for 10 to 25 years. Regular monitoring and prompt addressing of issues can help extend their longevity.
FAQ
How much does a fiber optic star ceiling cost?
Fiber optic star ceiling prices depend on room size, number of stars, and cable type. On average, prices range from $800 to $5000 or more. DIY installation is possible, but hiring a professional ensures safety and optimal results at an added cost.
Are fiber optic lights better than LEDs?
Fiber optic lights and LED lights have their own advantages and disadvantages. While fiber optic lights are ideal for creating a starry-night effect, LED lights offer more versatility. Additionally, fiber optic lights use no electricity and are safer in wet environments. Ultimately, the choice between the two depends on your lighting needs and preferences.

Are fiber optic lights expensive?
Fiber optic lights can vary in cost depending on their type and quality. They generally tend to be more expensive than traditional lighting options. However, their long lifespan and energy efficiency make them a worthwhile investment. Consider your budget and lighting needs when deciding if fiber optic ceiling lights are right for you.
READ ALSO: Plug In Wall Lights: How To Choose The Perfect Lighting Solution For Your Living Space
What is the main disadvantage of fiber optic lighting systems?
While fiber optic lighting systems offer many advantages, they do have one main disadvantage. They can be more expensive than traditional lighting options, and they require careful installation and maintenance due to their fragile nature. Additionally, repairs or component replacements may require the expertise of a specialized technician. Lastly, fiber optic lighting may not provide as much brightness or illumination as traditional lighting systems.
Finally, fiber optic ceiling lights add beauty and class to any room. These lights include energy efficiency, durability, and design adaptability. You can simply install these lights in your house or business by following the step-by-step tutorial and taking safety measures. Design, ceiling prep, fiber optic wiring, and light source connection Know how to overcome installation challenges. With proper care, fiber optic ceiling panels may last a long time and produce excellent ambient lighting. You’ll love fiber optic ceiling lights.
READ ALSO: How Dotless LED Strip Lights Create A Soft, Uniform Light


