Is your Jio remote blinking a red light and not working? Many users face this issue. So, why is the red light blinking in Jio remote? It can happen due to low battery, pairing problems, or signal issues. Sometimes, a simple reset or battery change can fix it.
In this guide, we’ll show you easy steps to solve the red light blinking problem. Follow these tips to get your remote working again.
No need for technical skills. Just simple solutions that work. Let’s fix your Jio remote quickly.
Why Red light blinking in Jio remote?
If your Jio remote is blinking a red light, it typically indicates an issue that needs attention.
Here are some possible reasons for this behavior:
- Low Battery Power: The most common cause is depleted batteries. When the battery level is low, the remote may blink red to signal the need for replacement.
- Pairing Issues: If the remote has lost its connection with the set-top box, it might blink red to indicate that it’s unpaired and needs to be reconnected.
- Stuck or Faulty Buttons: A button that is stuck or malfunctioning can cause the remote to send continuous signals, leading to a blinking red light.
- Firmware or Software Glitches: Occasionally, software issues within the remote or set-top box can result in erratic behavior, including the red light blinking.
- Interference from Other Devices: Electronic devices nearby can interfere with the remote’s signal. This resulted in a malfunction, causing it to flash a warning with an urgent blinking red light.
If you’ve already tried replacing the batteries and ensuring the remote is properly paired but the issue persists, don’t worry!
Just run some diagnostics through the MyJio app or contact Jio customer support and they’ll be happy to help.
How to reset Jio remote?
If your Jio Set-Top Box remote isn’t working, you can diagnose and potentially fix the issue using the Run Diagnostics feature in the MyJio app. Here’s how:
- Open the MyJio App: Launch the app on your smartphone.
- Navigate to ‘Fiber’: Tap on the ‘Fiber’ tab located at the top menu.
- Access ‘JioCare’: At the bottom bar, select ‘JioCare’ to proceed to the diagnostics section.
- Select ‘Run Diagnostics’: Choose this option to begin the diagnostic process.
- Check Remote Connectivity: Tap on ‘Set Top Box remote connectivity’ and then press the ‘Run Diagnostics’ button.
- Fix Detected Issues: If any problems are identified, click on ‘Fix Now’ to resolve them.
This process will help assess various aspects of your remote, such as battery status and pairing issues. If problems persist after following these steps, consider reaching out to Jio customer support for further assistance.
Read Also: Jio fiber router is not working? How to reset Jio fiber router
How to pair the Jio remote?
So setting up your Jio Set-Top Box (STB) remote is a piece of cake! It depends on your remote model, you can pair it with the STB via Bluetooth. And, in some cases, control your TV using infrared (IR) functionality.
Here’s how to do it:
Pairing Jio Remote with the Set-Top Box (via Bluetooth)
- Power On: Ensure your Jio STB is turned on.
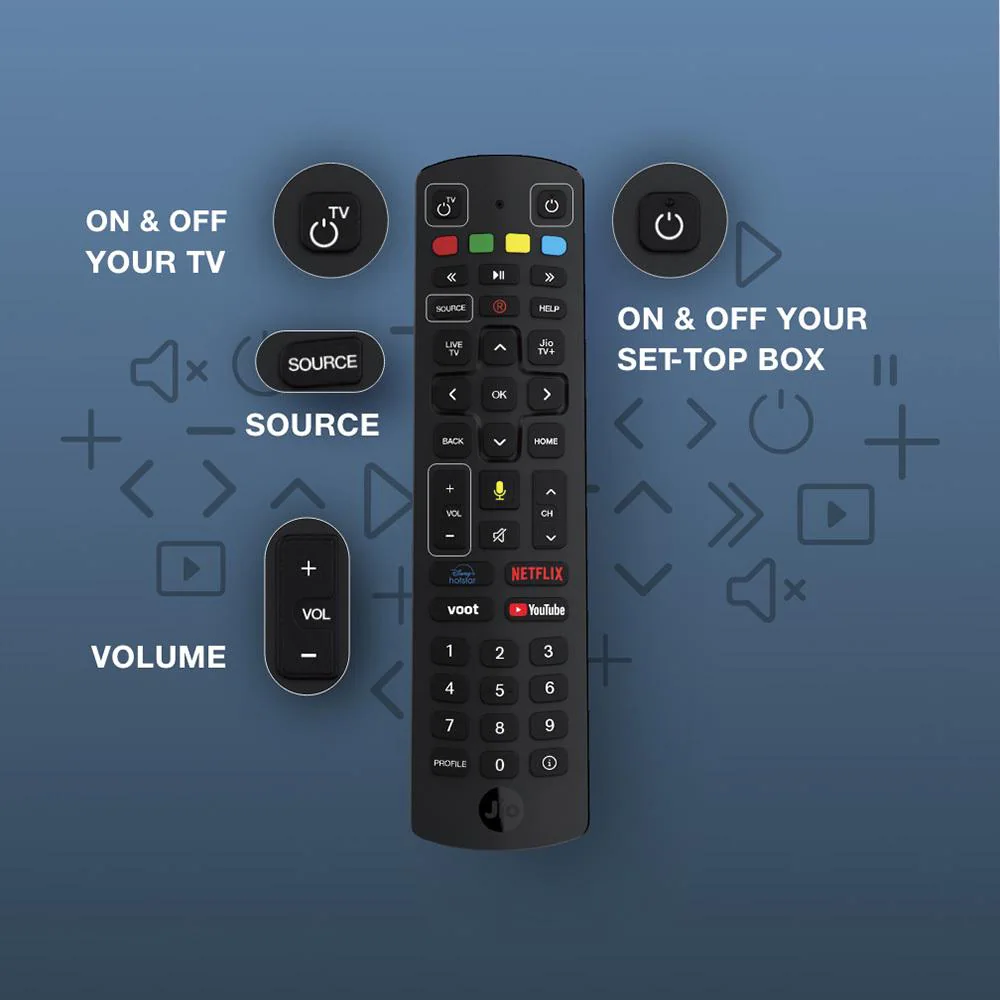
- Enter Pairing Mode: Press and hold the ‘OK’ and ‘Home’ buttons on your remote simultaneously for about 3-5 seconds.
- Observe LED Indicator: The LED on the remote will start blinking, indicating it’s in pairing mode.
- Automatic Pairing: The STB should automatically detect and pair with the remote.
- Confirmation: Once paired, the LED will stop blinking, confirming a successful connection.
Read Also: Jio Mesh Extender Not Working! Easy Fixes to Try Now!

Pairing Jio Remote with Your TV (for Universal Control)
Some Jio remotes come with universal control features, allowing you to operate your TV. To set this up:
- Access Settings: Navigate to the ‘Settings’ menu on your Jio STB.
- Select ‘Remote & Accessories’: Choose this option to manage remote settings.
- Add Accessory: Select ‘Add Accessory’ to initiate the pairing process.
- Choose Your TV Brand: From the list, select your TV’s brand.
- Follow On-Screen Instructions: The STB will guide you through the steps to complete the pairing.
Note: The availability of universal control features may vary based on your remote model and TV compatibility.
Read Also: Jio Airfiber troubleshooting no signal? Have you Tried These!
Jio remote not working after the battery change? Let’s Try This
If your Jio remote isn’t working after a battery change. Don’t worry—this is a common issue with several potential solutions.
Here’s a step-by-step guide to help you troubleshoot and resolve the problem:
Step-by-step fixes for Jio Remote Not Working After Battery Change

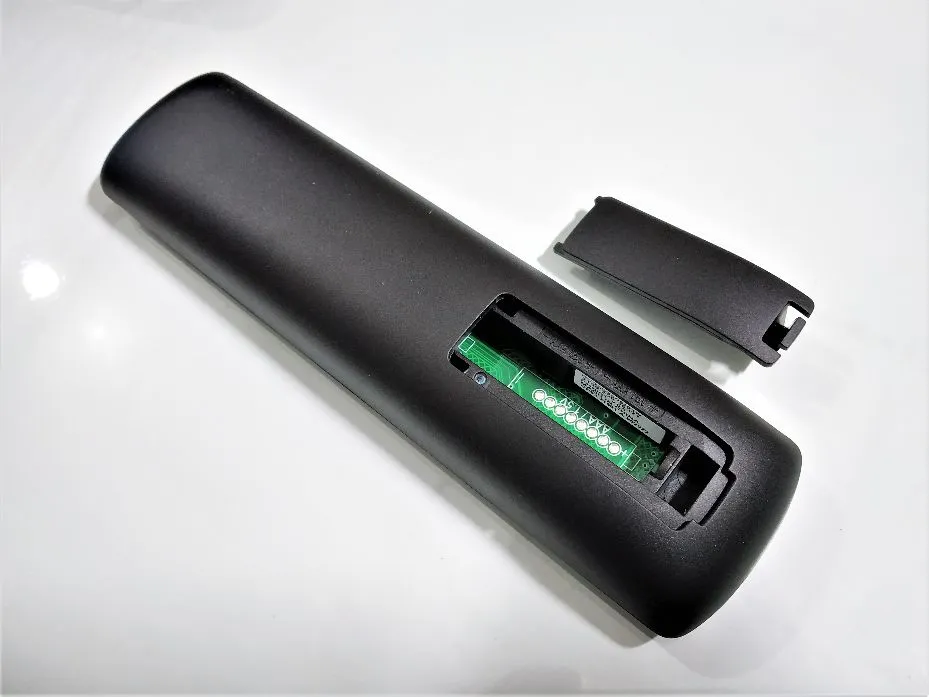
Check Battery Orientation and Type
Ensure the new batteries are inserted correctly, aligning the positive (+) and negative (−) ends as indicated.
Use the recommended battery type, typically AAA alkaline batteries.
Inspect Battery Contacts
Examine the battery compartment for any corrosion or debris. Then clean the contacts gently with a dry cloth or a cotton swab dipped in rubbing alcohol.
Re-pair the Remote with the Set-Top Box
- Press and hold the ‘OK’ and ‘Home’ buttons simultaneously for about 5 seconds.
- The LED on the remote should start blinking, indicating it’s in pairing mode.
- The set-top box should automatically detect and pair with the remote.

Use the MyJio App to Diagnose the Issue
- Open the MyJio app on your smartphone.
- Tap on the ‘Fiber’ tab at the top.
- Select ‘JioCare’ from the bottom menu.
- Choose ‘Run Diagnostics’.
- Select ‘Set Top Box remote connectivity’ and tap on ‘Run Diagnostics’.
If any issues are detected, follow the on-screen instructions to fix them.
Power Cycle the Set-Top Box
- Unplug the set-top box from the power source.
- Wait for about 30 seconds.
- Plug it back in and turn it on.
- Try using the remote again.
Test the Remote’s Infrared (IR) Signal
Use a smartphone camera to check if the remote is emitting an IR signal. Point the remote at the camera and press any button; you should see a light on the camera screen.
If there’s no light, the remote may be faulty and require replacement.
Read Also: How to Master Jio Fiber Proxy Settings: A Simple Guide
In conclusion, if your Jio remote isn’t functioning after a battery change, don’t worry—this is a common issue with several potential solutions.
Follow the steps outlined above to quickly resolve the problem. These include checking the battery orientation, cleaning the contacts, repairing the remote, and using the MyJio app’s diagnostics.
If these steps don’t help, contact Jio customer support.


