Are your fluorescent lights acting up? What’s wrong with your TV? Does it flicker, buzz, or not work at all? You might need to change the Fluorescent light socket. It’s a small part that can cause big problems when it gets old. Don’t worry, it’s an easy fix!
Want to replace it yourself? It’s helpful to know a few things first. You’ll need to replace the socket and figure out whether it needs to be shunted. There are also different socket sizes (like T12 or T8).
Unsure where to get all this? Stores like Lowe’s can help. Or search online for parts near you. Ready to fix your lights? Check out how to replace a fluorescent light socket!
How to replace a fluorescent light socket
A fluorescent light socket replacement at Lowe’s can be tricky, so prioritize safety. Here’s how to do it, but if you’re unsure, talk to a qualified electrician.
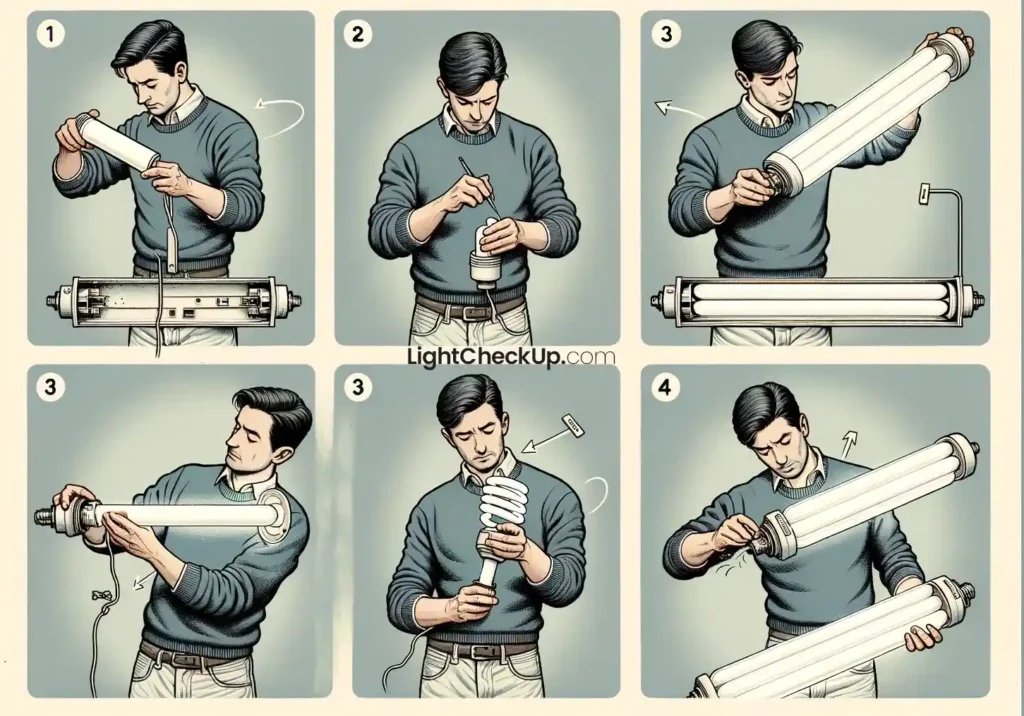
Turn off the power. Locate the circuit breaker that controls the light fixture and turn it off. Use a voltage tester to make sure the power is off.
Remove the light diffuser. This is the plastic cover below the fluorescent tubes. It might be held in place by screws, clips, or latches. Consult the fixture’s manual or search online for specific removal instructions for your model.
Make sure the fluorescent tubes are off. Carefully rotate and remove the tubes from their sockets. Dispose of them properly at a designated hazardous waste facility, as they contain mercury.
Identify the socket type. There are two main types of fluorescent light sockets in T12: tombstones and bi-pin sockets. Tombstones are rectangular boxes that house the entire starting mechanism and electrical connections. Bi-pin sockets are smaller and are designed to hold the pins of fluorescent tubes.
Remove the old socket: It depends on the type:
The tombstone is usually screwed or clipped into place, so locate the screws or release mechanisms and carefully remove it.
Bi-pin sockets: These might twist or pull out, depending on the model. Consult the fixture’s manual or online guides for details.
Replace the socket.
- Match the new socket: Ensure the replacement socket is compatible with your fixture and the type of fluorescent tube you plan to use.
- Connect the wires: This step requires electrical knowledge and caution. If you’re not comfortable with electrical work, consult a qualified electrician to ensure proper and safe connections. To begin with, you’ll need to match the colored wires of the installed socket to the corresponding wires in the fixture using wire connectors.
- Install the updated socket: Secure the replaced socket in place, follow the same method used to remove the old one (screwing, clipping, etc.).
Replace the fluorescent tubes, diffuser panel, and any other components you removed.
Turn the power back on at the circuit breaker and test the light fixture.
Read Also: 10 Easy Steps To Replace Halogen Ceiling Light Bulbs: Try It!
Why are shunted sockets different from non-shunted ones?
The difference between shunted and non-dunted sockets is how they handle electrical flow. Shunted sockets are like single-lane highways, where power enters through one point and feeds both bulbs.
Unlike shunted sockets, non-shunted ones have two separate lanes for every contact. Use the right socket type for your lighting setup to avoid malfunctions, shortened bulb life, and even fires. Always consult a qualified electrician or fixture manual before working with electrical components.
Read Also: How To Repair Halogen Light Fixtures (Troubleshooting With Pictures)
What is a fluorescent light tombstone?
Fluorescent light tombstones, also known as lamp holders or sockets, hold the fluorescent tube and connect it to the electrical system. In addition to providing a secure connection to the tube, it makes sure electricity flows right, so the light fixture works well.
What is a shunted fluorescent socket?
Fluorescent sockets with shunted outlets share electrical flow between multiple bulbs. They act like one-lane highways, where power enters from one point and feeds all bulbs.
Read Also: How Do You Replace U-Shaped Fluorescent Bulbs With LED? Try 5 Simple Tricks
In conclusion, replacing a fluorescent light socket t8 is a simple task that solves common issues with flickering, buzzing, or non-working fluorescent lights.
When you know which kind of socket you need (shunted or non-shunted) and which size you need (like T12 or T8), you can find it easily. If you replace the socket yourself, you’ll save money and make sure your lights work again. Here’s a step-by-step guide to roeplace fluorescent light sockets!


Average Rating