Tired of the same rustic open box light fixtures? Looking for a stylish style boost without breaking the bank? Open box light fixtures are the answer! There are great deals on everything from vintage-inspired lights to gently used open box lights here.
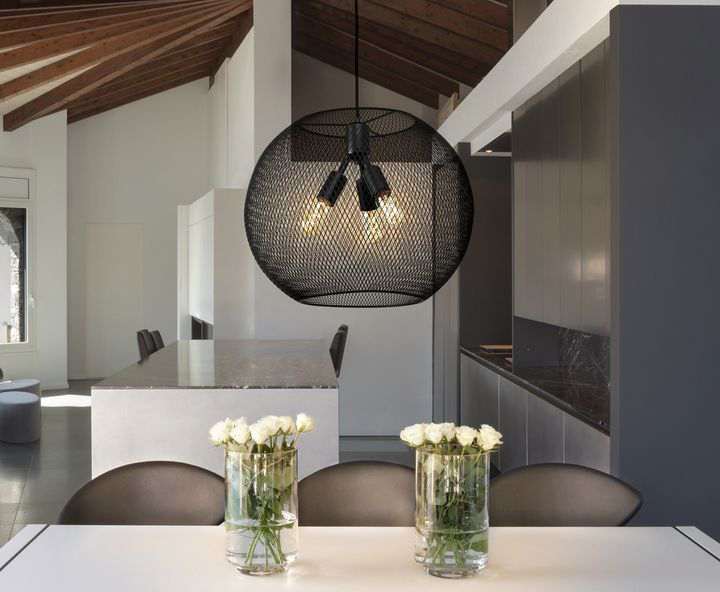
Take a look at our standout open box light fixtures, including black open box light fixtures and white open box light fixtures that are a perfect example of aesthetics.
We’ve got top-quality brands at discount prices. Are you ready to snag some amazing open box lighting deals? Let’s find one that fits your style!
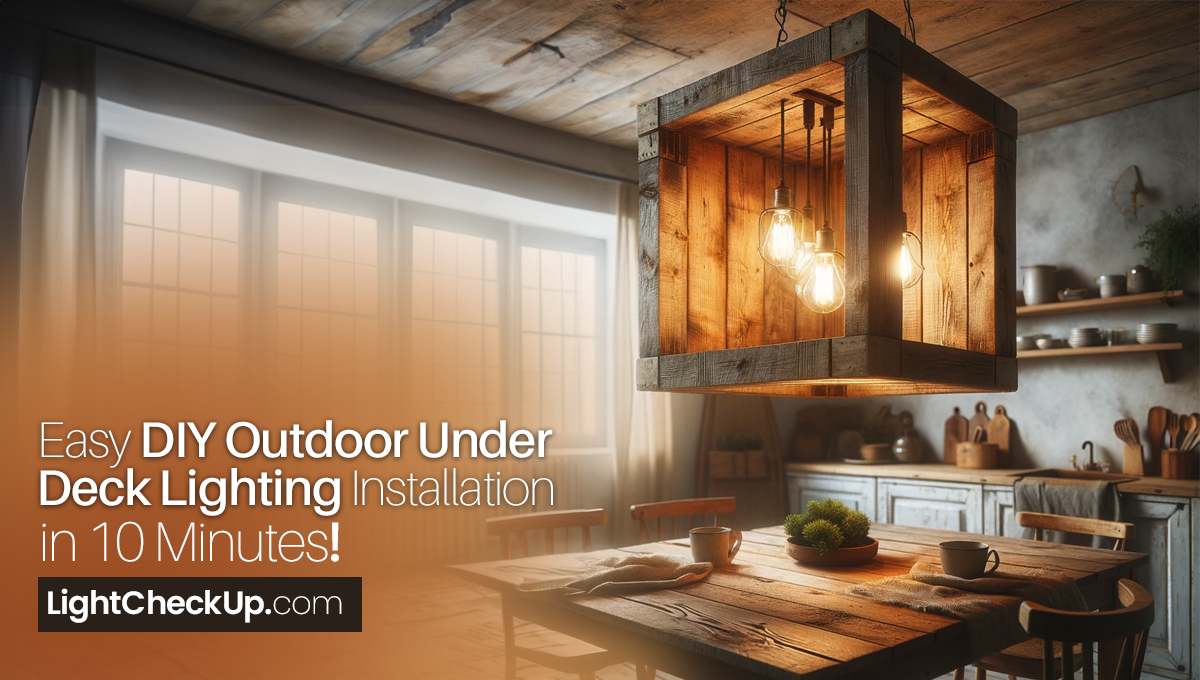
Easy DIY Rustic Open Box Light Fixtures: Charm on a Budget
Open box light fixtures offer amazing prices without sacrificing style. One-of-a-kind pieces you can’t find anywhere else. It is eco-friendly to recycle perfectly functional fixtures in order to reduce waste.
Your choice of weathered wood stain for your open box light fixture. Edison bulbs are great. You can add chicken wire or twine.
For a rustic light fixture, you need reclaimed wood, light bulb sockets, electrical wire, wire connectors, a ceiling canopy kit, wood screws, a drill and bits, a saw, and sandpaper. Optionally, use wood stain and sealant for a finished look. These essentials will help you craft a charming and warm lighting piece for your space.
Design Your Fixtures:
Measure the open box’s size. Consider how it will hang and the scale in relation to the room’s size and ceiling height. Make a sketch, including where the bulbs go.
Cut and prepare the wood:
You’ll need to cut your wood planks to the required dimensions for the sides and back.
Make sure all splinters and rough spots are gone by sanding. You can stain the wood if you want, and let it dry completely before applying varnish or sealant.
Assemble the box:
Make sure you drill pilot holes to keep the wood from splitting. You’ll need wood screws to assemble the planks into a sturdy box structure.
Install the light sockets:
Your light bulbs should go in the box in a certain order. Make holes or mount them on the wood for the sockets.
Wire each socket with a wire connector following the manufacturer’s instructions. Check all the connections.
Wiring and mounting:
Don’t do electrical work if you don’t know how. You’ll need to connect the fixture’s wiring to your home’s electrical system (usually at an existing ceiling fixture).
Then mount the entire fixture to the ceiling using the canopy kit’s instructions.
Install LED bulbs in the sockets for energy efficiency and long life. You’re done! Start it up and see what happens.
Read Also: Can You Use Outdoor Lights Indoor? 4 Helpful Tips And Tricks To Light Your Home
How to upgrade an older outdoor fixture with a larger one?
The first step is removing the old outdoor fixture and disconnecting the electrical wiring. Measure the dimensions of the new fixture and make sure it’ll fit properly in your home. Connect the wiring and secure it according to the manufacturer’s instructions.
Read Also: Want To Brighten Your Space? 5 Best Solar Lights For Home Decoration
How do you replace a ceiling light fixture in 8 simple steps?
- Remove the circuit breaker from the existing light fixture.
- Unscrew the mounting screws and disconnect the wires from the old fixture.
- Install the ceiling box, if necessary, using an old-work or a retrofit box.
- Use wire connectors to connect the wires in the ceiling box to the new light fixture.
- Secure the installed light fixture to the ceiling box. You can use the provided mounting screws.
- Turn the power back on at the circuit breaker and test the installed light fixture.
- Adjust the height of the light fixture if necessary.
- Enjoy your newly installed ceiling light fixture!
Read Also: How To Install And Maintain String Light Bulbs DIY: 6 Easy Steps
How do I hang a modern fixture over a square recessed box?
It’s best to make sure the new fixture fits and meets the box’s electrical requirements before hanging it over a square recessed box. You’ll need a mounting bracket or adapter plate if the existing fixture doesn’t fit directly.
Turn off the power at the breaker. If there’s an old fixture, unscrew it and disconnect the wires. Connect the fixture’s wires to the box—usually black to black, white to white, and green to bare wire. Turn the power back on, secure the fixture with screws, and test the light. If you’re not sure what you’re doing, hire an electrician.
Read Also: Govee Curtain Lights: How It Will Be A Game-Changer For Home Decor 2024
Is it difficult to change a light fixture yourself?
You can change your own light fixture if you know how electrical wiring works and follow the precautions. If you’re not comfortable working with electricity, you should always hire a pro to make sure the job is done right.
Read Also: Home Interior Decorative Lights: 101 Ideas To Transform Your Space
In conclusion, changing open box light fixtures yourself can be a manageable task if you have the knowledge and confidence to work with electrical wiring. However, if you’re unsure or uncomfortable, hire a professional to make sure the fixture is installed properly and safely.
Read Also: Add A Touch Of Elegance: How Spider Floor Lamps Bring Life To Spaces


Average Rating